Connect Your AI Apps to Vendasta
By the end of this guide, your AI app will be able to read and update your Vendasta data when you ask it in plain English — for example, "Create a contact named Jane Doe."
Vendasta provides an MCP server for this. MCP (Model Context Protocol) is the open standard that lets AI apps like Claude securely talk to platforms like Vendasta. You connect once and sign in with your Vendasta account; after that, your AI app discovers what it can do on its own.
Before you start
You need exactly two things:
- An AI app — any MCP-capable app works. This guide covers Claude and ChatGPT in the browser (no install), plus Claude Code, Antigravity (Google's successor to Gemini CLI), and Cursor.
- Your Vendasta login — the same account you use to sign in to the platform. No keys or tokens to copy (Cursor is the one exception — its tab explains).
Scripts and service integrations that run without a person present authenticate with a service-account token instead of a login — see the Authorization guide. Everything below assumes the interactive path.
Everything below uses this server address:
https://mcp.vendasta.com/mcp
Connect your AI app
Pick the tab for your app. Each tab is a complete walkthrough — connect, sign in, and check it worked.
- Claude Web
- ChatGPT Web
- Claude CLI
- Antigravity (Gemini)
- Cursor
No installation needed — everything happens at claude.ai.
Vendasta will soon be available in Claude's built-in connector directory — one click, no setup. Until then, follow the steps below.
On Claude Team/Enterprise workspaces, custom connectors are added by a workspace admin — if you don't see the Add button below, ask yours.
Installation and configuration
-
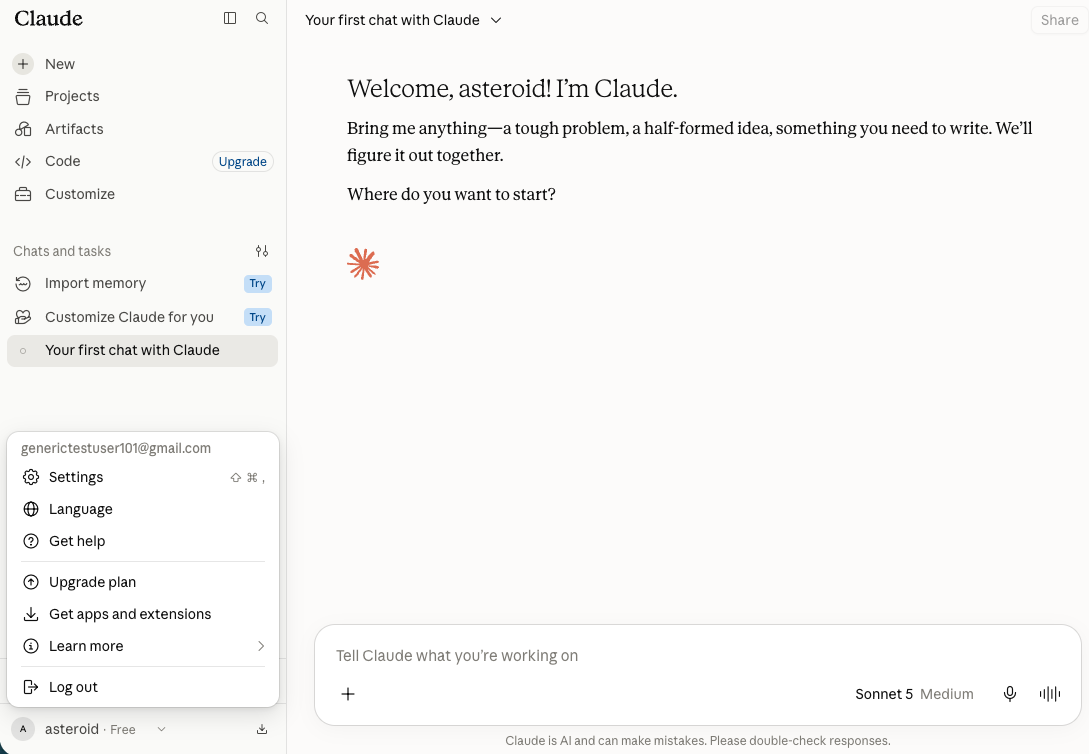
Open Settings — click your initials (bottom-left) and choose Settings:
-
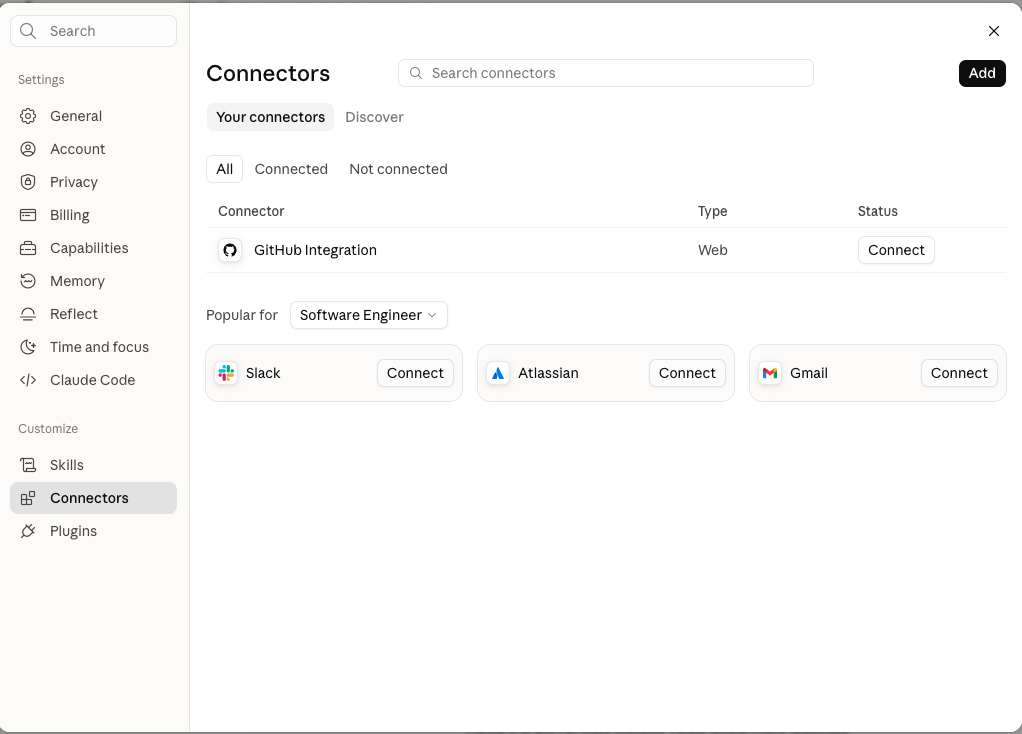
Go to Connectors and click Add (top-right):
-
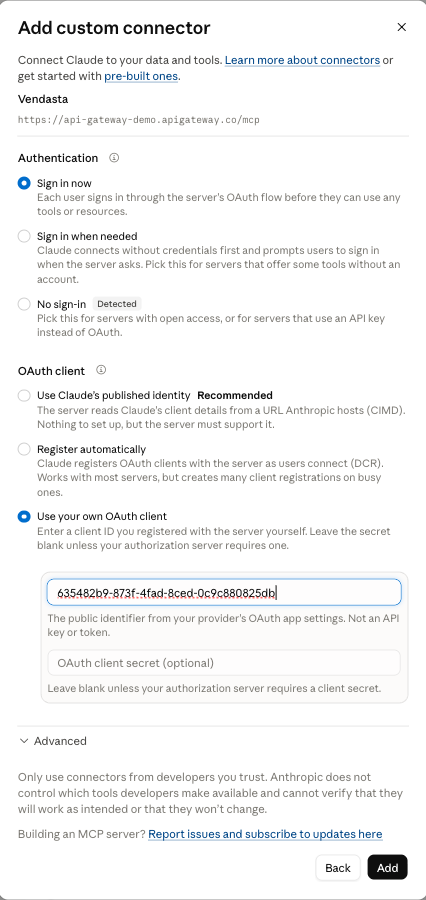
Fill in the connector — name it
Vendasta, paste the server address, and make two choices:- Authentication: Sign in now
- OAuth client: Use your own OAuth client, and paste the Client ID
635482b9-873f-4fad-8ced-0c9c880825db(leave the secret blank)
Then click Add.
-
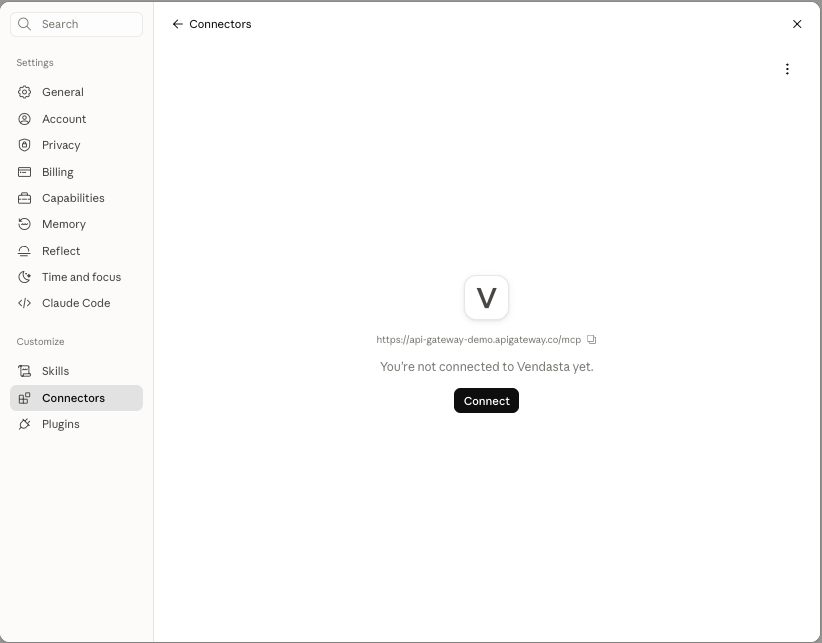
Connect — open the new Vendasta connector and press Connect:
-
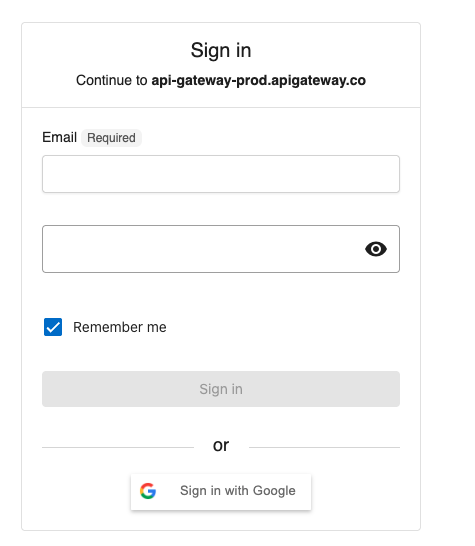
Sign in with your Vendasta account — enter your email and password, or continue with Google (if you're already signed in, this step is skipped):
-
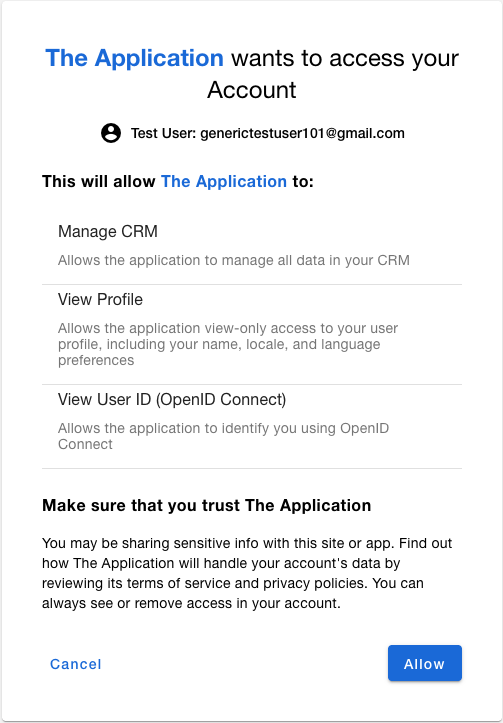
Review what you're allowing — then click Allow:
Check it worked
-
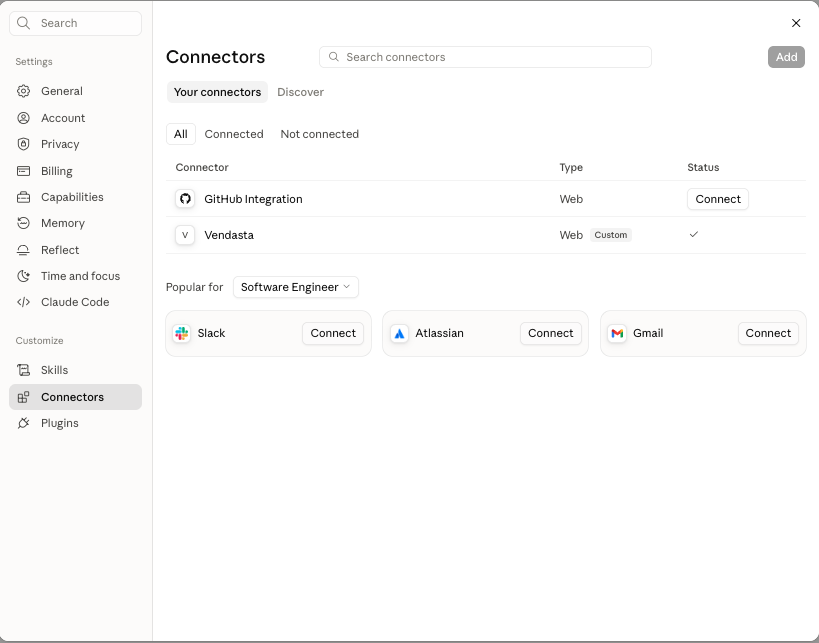
Check the connector list — Vendasta now shows as connected:
-
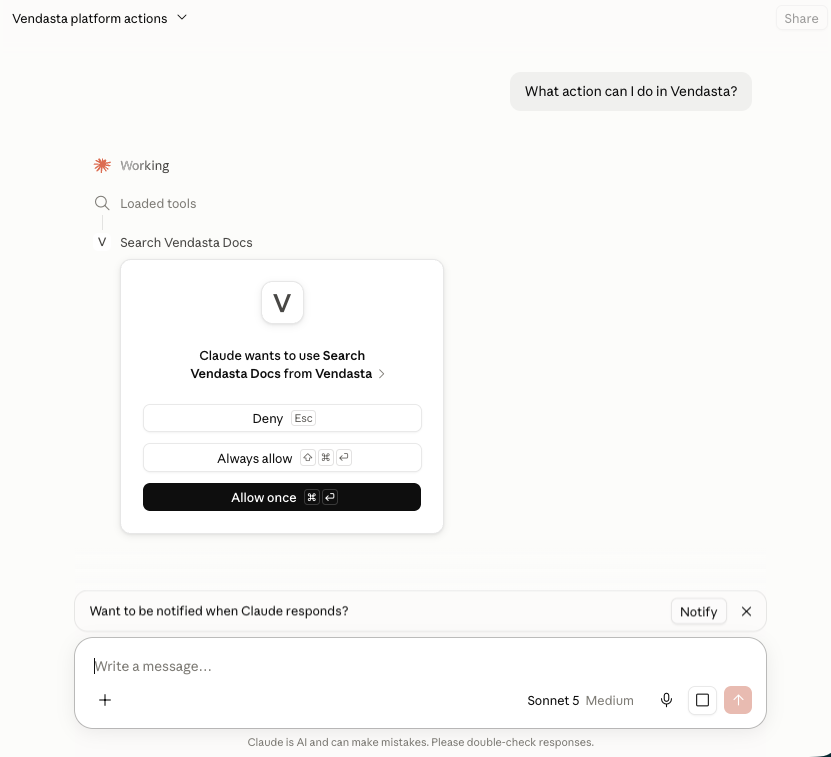
Use it in a chat — start a new chat and ask:
What action can I do in Vendasta?
Claude asks for your permission the first time it uses a Vendasta tool — allow it:
-
See what you can do — Claude replies with everything the connector makes possible:
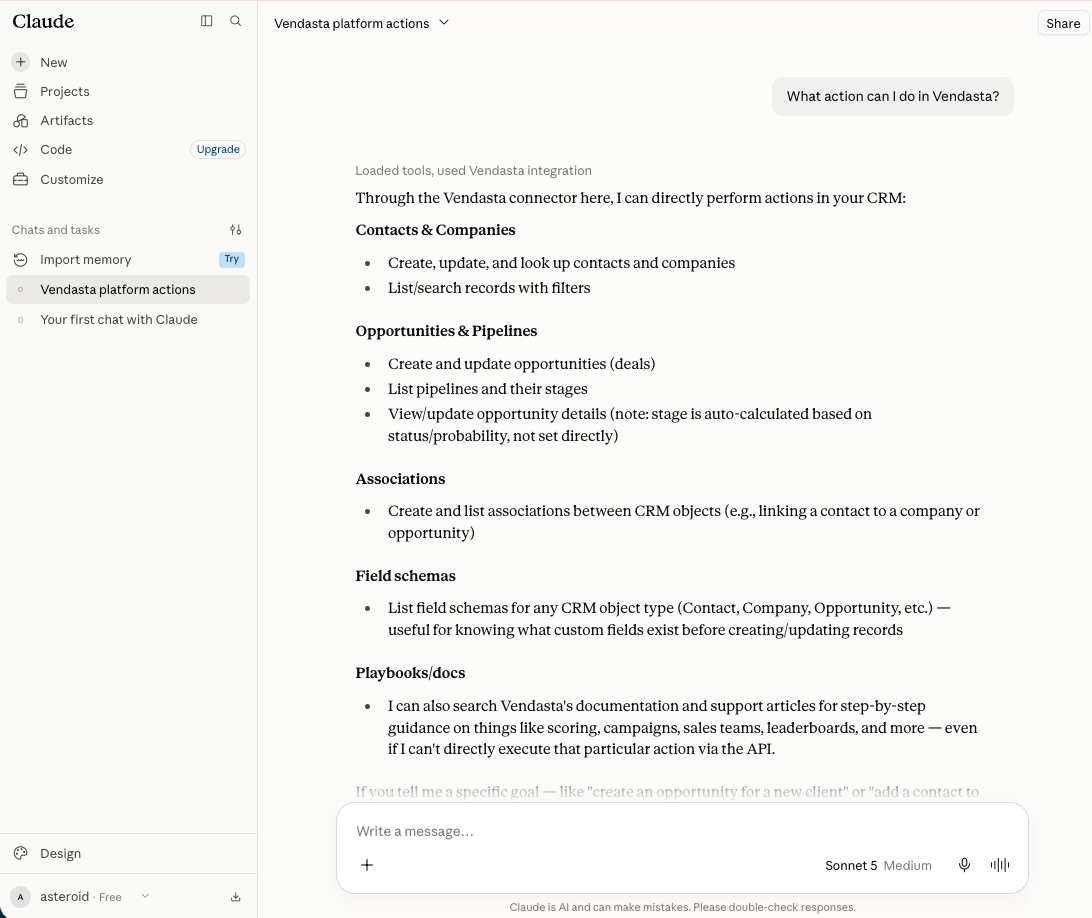
No installation needed — everything happens at chatgpt.com. ChatGPT calls connectors plugins, and custom ones require its developer mode.
Follow the steps exactly as written — in particular, name the plugin
Vendasta and copy the server address exactly as shown. If the sign-in page
shows an error mentioning redirect_uri, ChatGPT generated a connection
address we haven't approved yet — contact
support@vendasta.com with a screenshot and
we'll enable it.
Installation and configuration
-
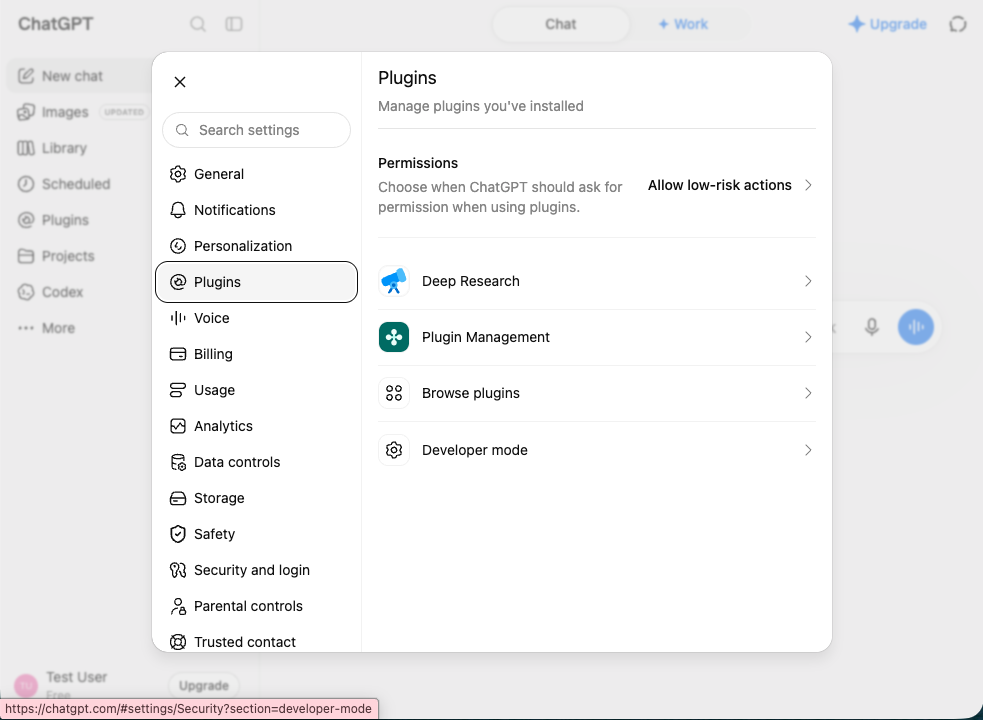
Turn on Developer mode — open Settings → Plugins, then choose Developer mode:
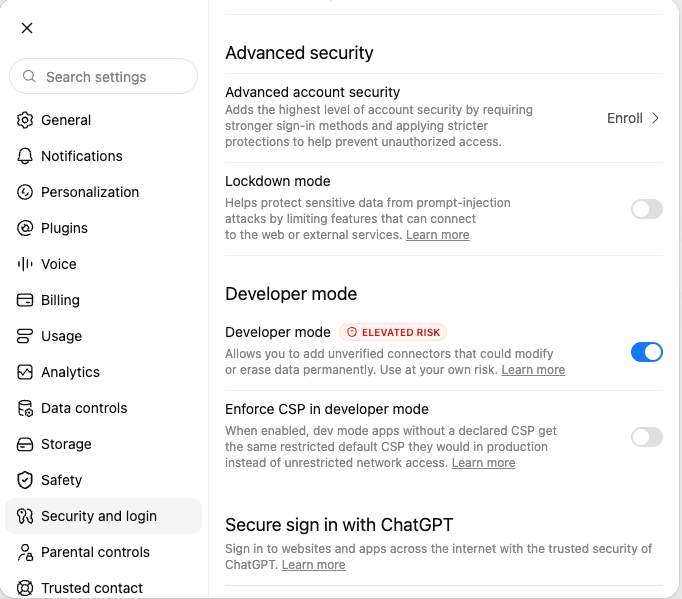
Toggle Developer mode on (the warning is standard for any connector ChatGPT hasn't reviewed):
-
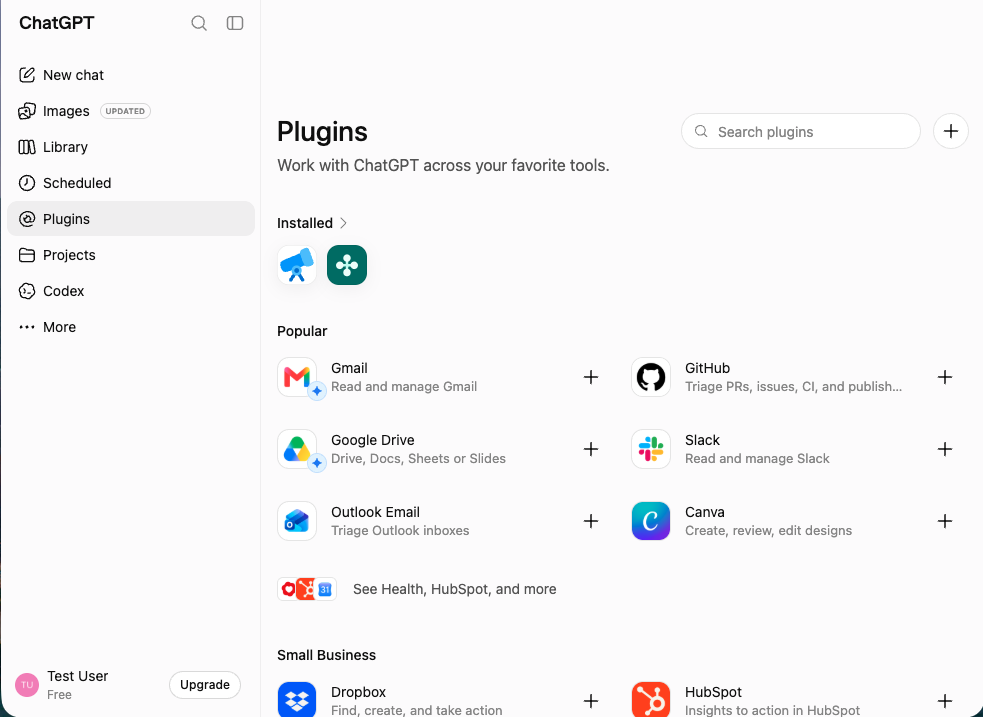
Create the plugin — open Plugins in the sidebar and click the + button:
-
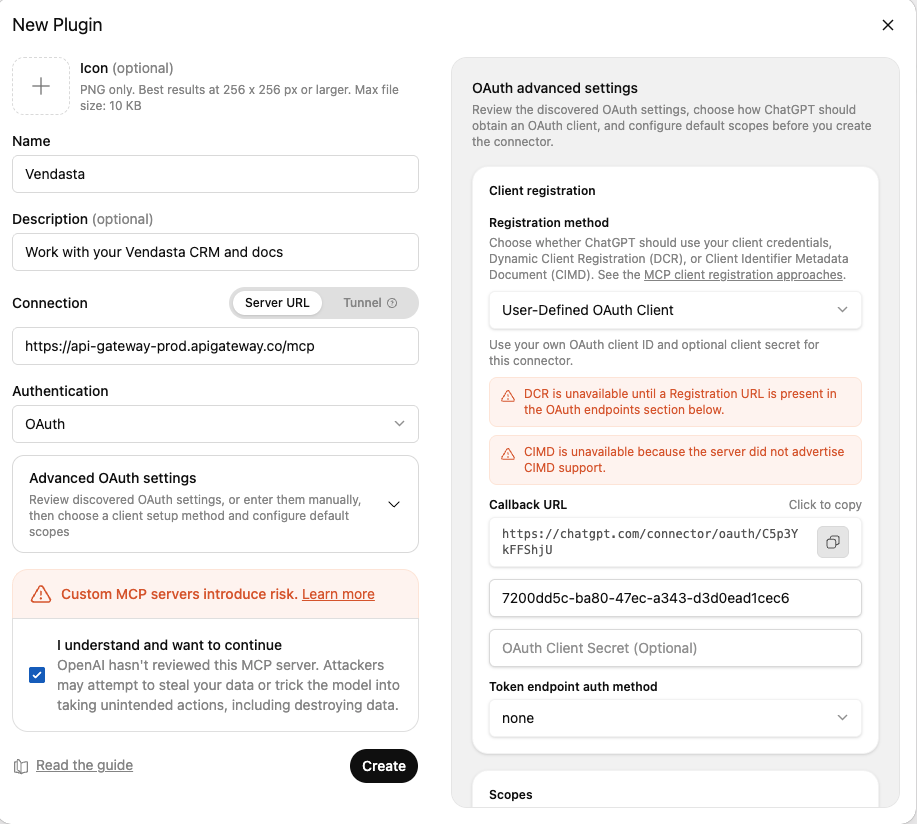
Fill in the details:
- Name:
Vendasta - Connection: Server URL →
https://mcp.vendasta.com/mcp - Authentication: OAuth
- Open Advanced OAuth settings → Registration method: User-Defined
OAuth Client → paste the Client ID
7200dd5c-ba80-47ec-a343-d3d0ead1cec6(leave the secret blank, token endpoint auth method none)
- Name:
-
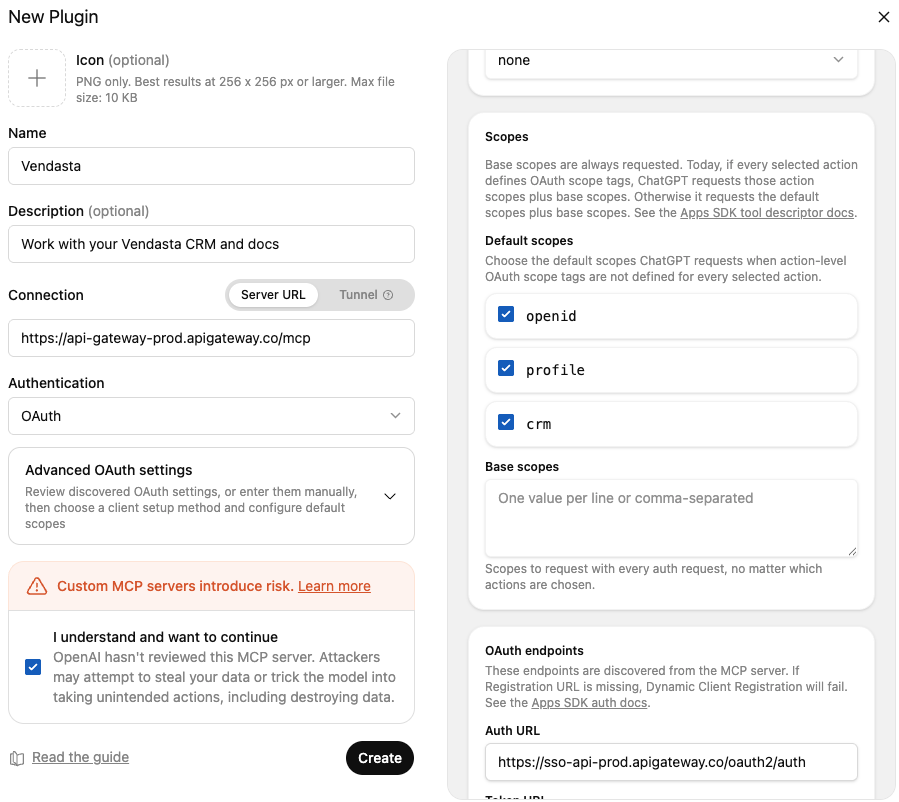
Leave the scopes as they are — they're discovered from the server automatically, along with the endpoint and OpenID panels below them. Nothing to change:
-
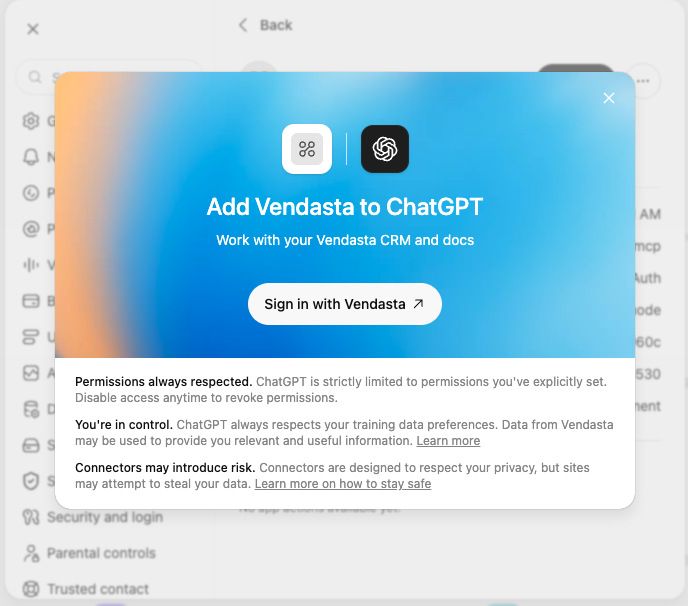
Create and sign in — tick I understand and want to continue, click Create, then Sign in with Vendasta. Sign in with your Vendasta account and click Allow.
Check it worked
-
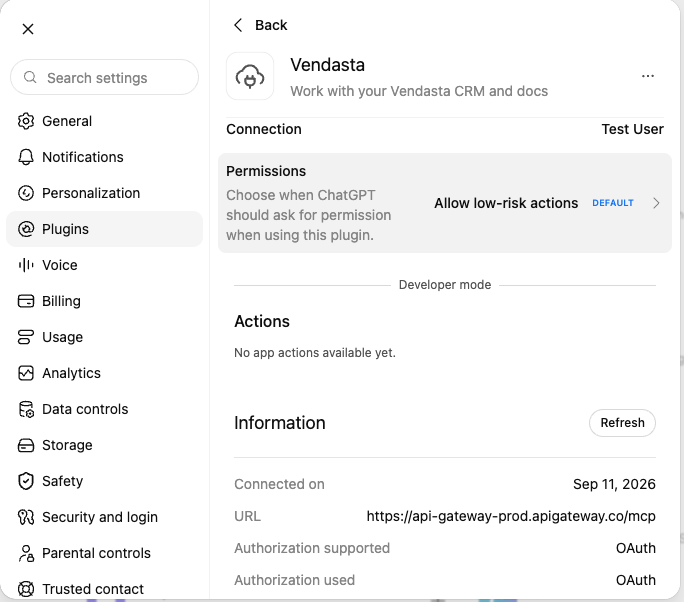
Check the plugin page — it shows your connection and when it was made:
-
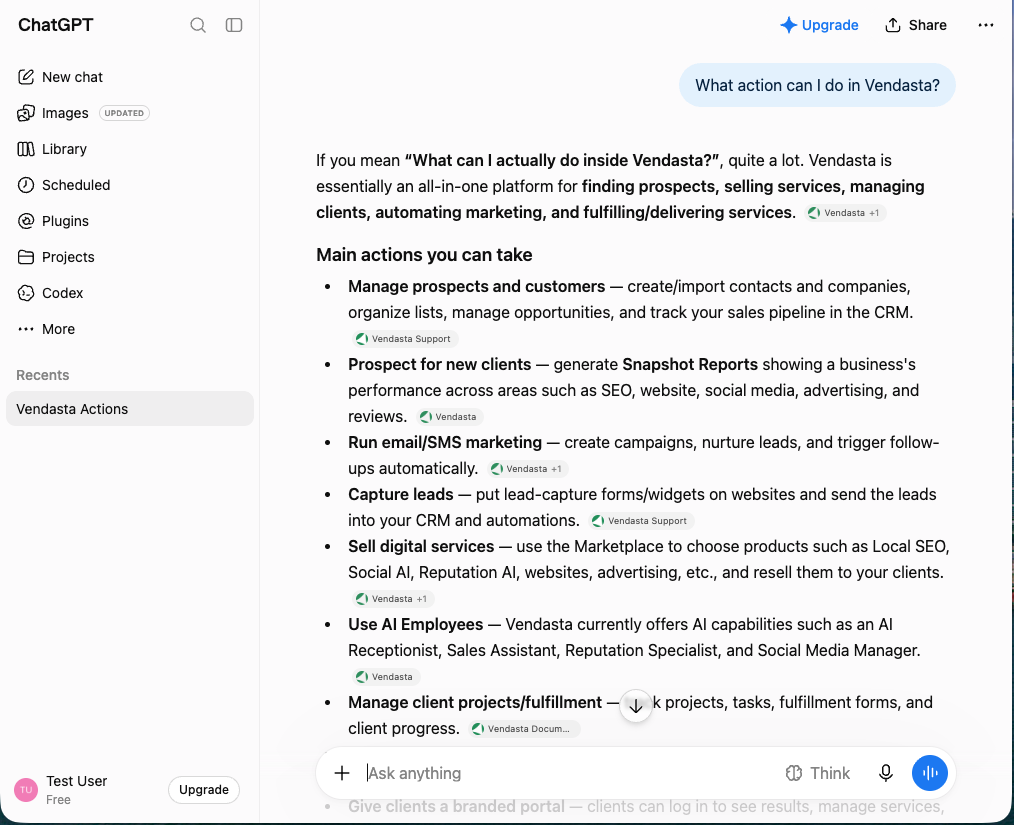
Ask in a chat:
What action can I do in Vendasta?
ChatGPT replies with everything the plugin makes possible — managing contacts and campaigns, searching documentation, and more:
Installation and configuration
-
Run one command — nothing in it needs to be changed:
claude mcp add --transport http \--client-id 635482b9-873f-4fad-8ced-0c9c880825db \vendasta https://mcp.vendasta.com/mcp
-
Open the server list — start Claude Code (
claude) and type/mcp. The new vendasta server is listed; it just needs you to sign in:
-
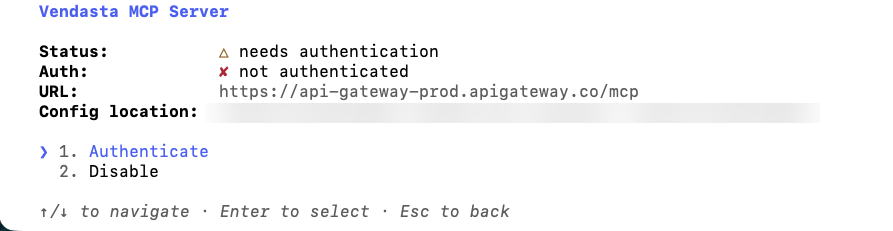
Choose Authenticate — press Enter on vendasta, then select Authenticate:
-
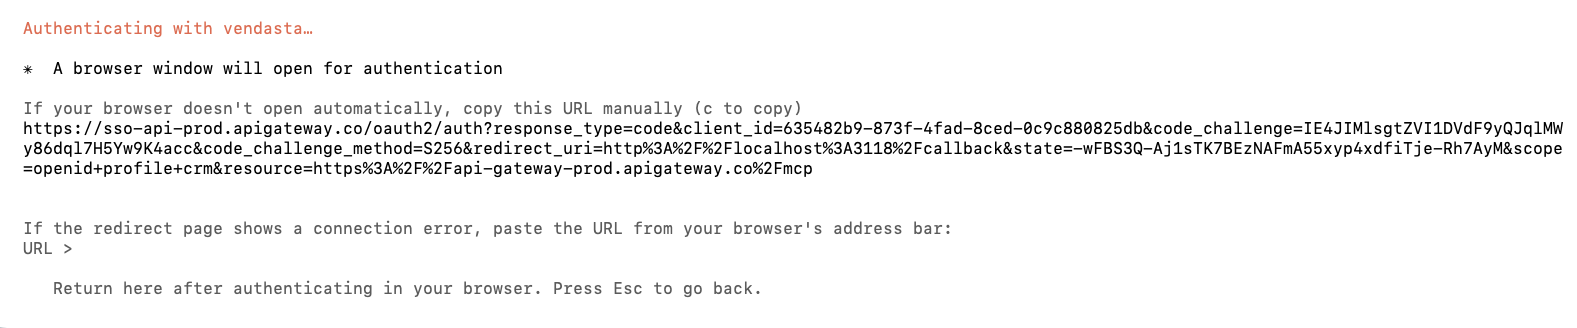
Your browser opens automatically (if it doesn't, copy the URL Claude shows you):
-
Sign in with your Vendasta account — enter your email and password, or continue with Google (if you're already signed in, this step is skipped):
-
Review what you're allowing — then click Allow:
-
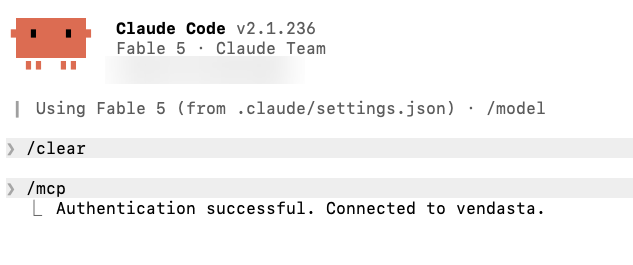
You're connected — back in the terminal:
Check it worked
-
Open the server list — type
/mcp. vendasta now shows as connected, with its tool count: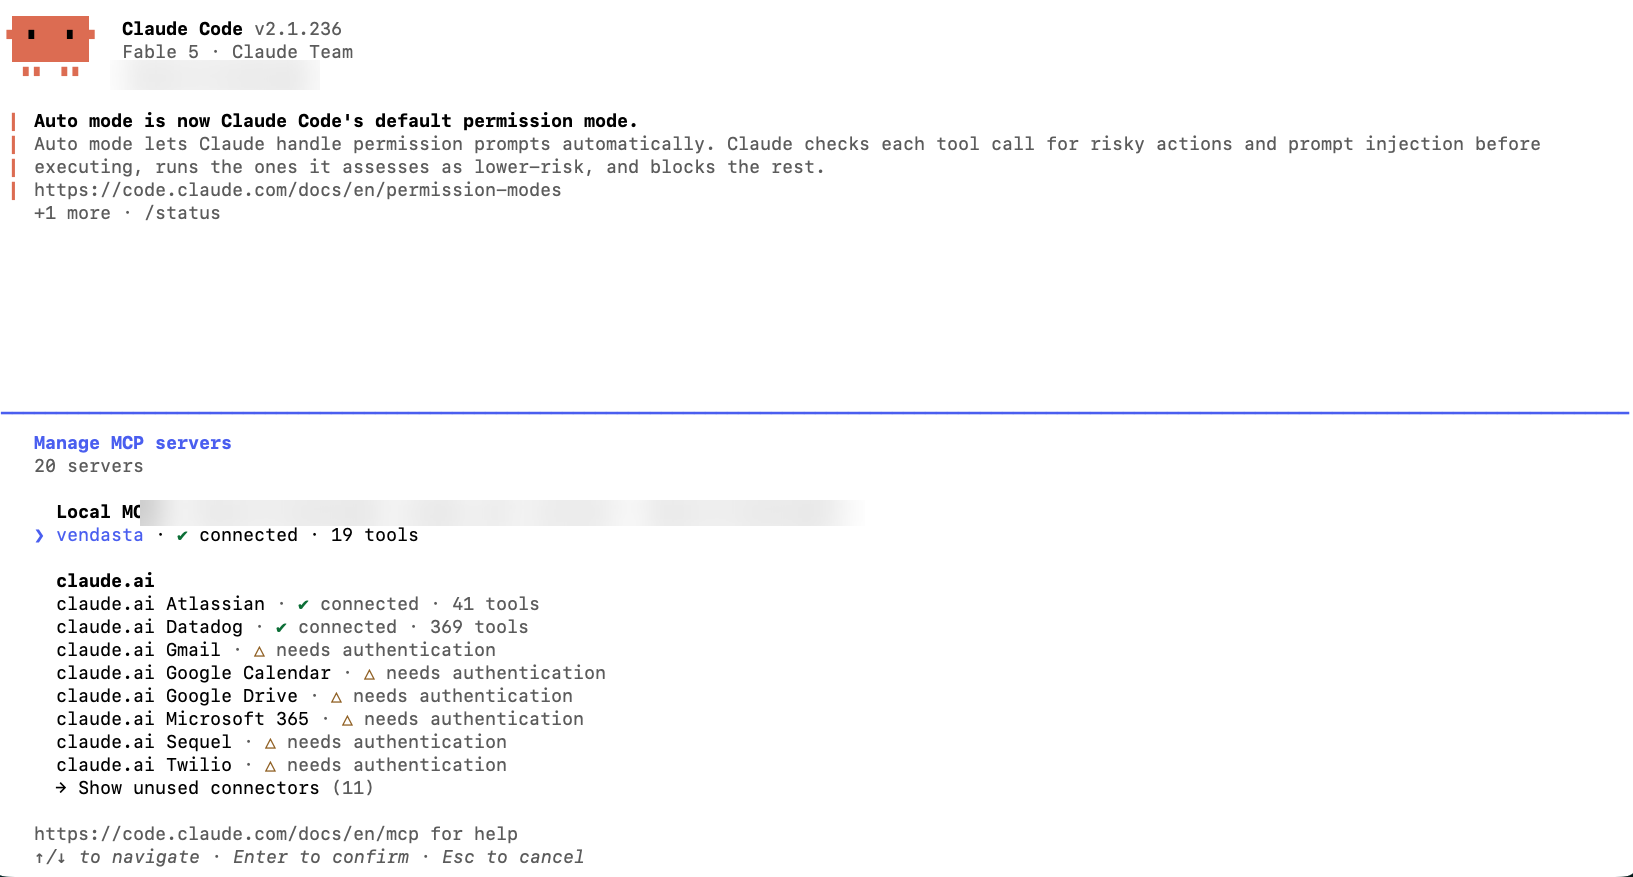
-
Select it to see the full status — connected, authenticated, and pointing at the Vendasta server:
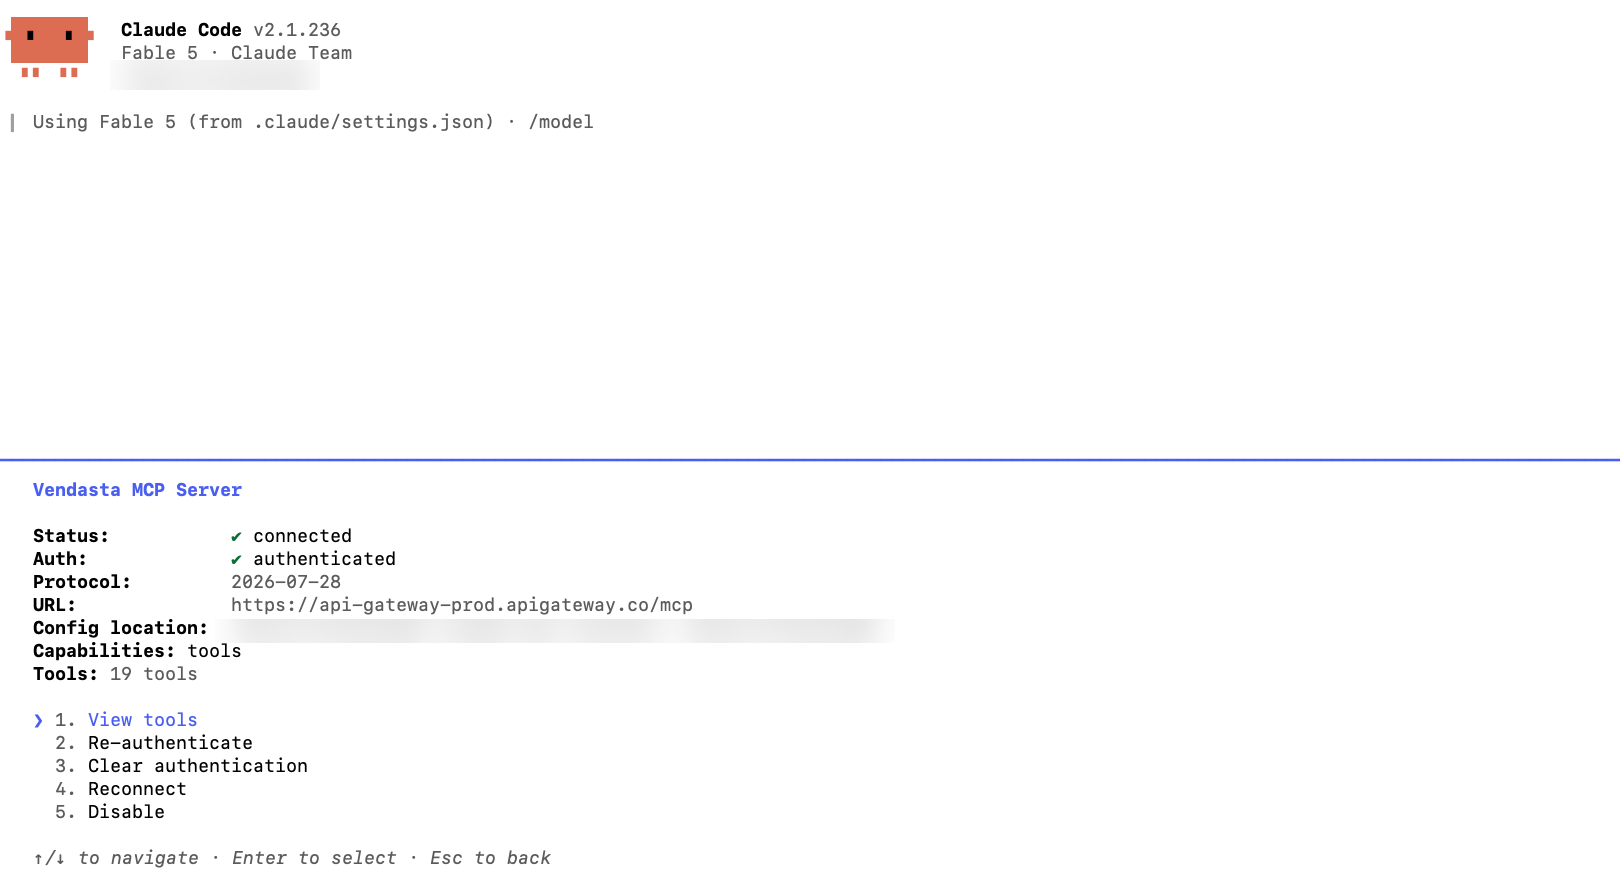
-
Choose View tools to browse everything your AI app can now do:
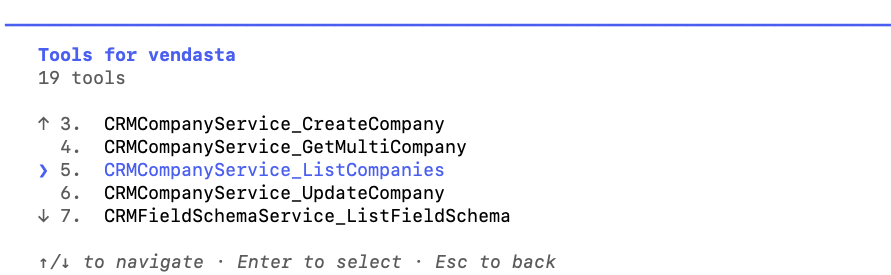
-
Every tool describes itself — select one to see what it does and what it needs. This is how your AI app knows how to use them without any setup:
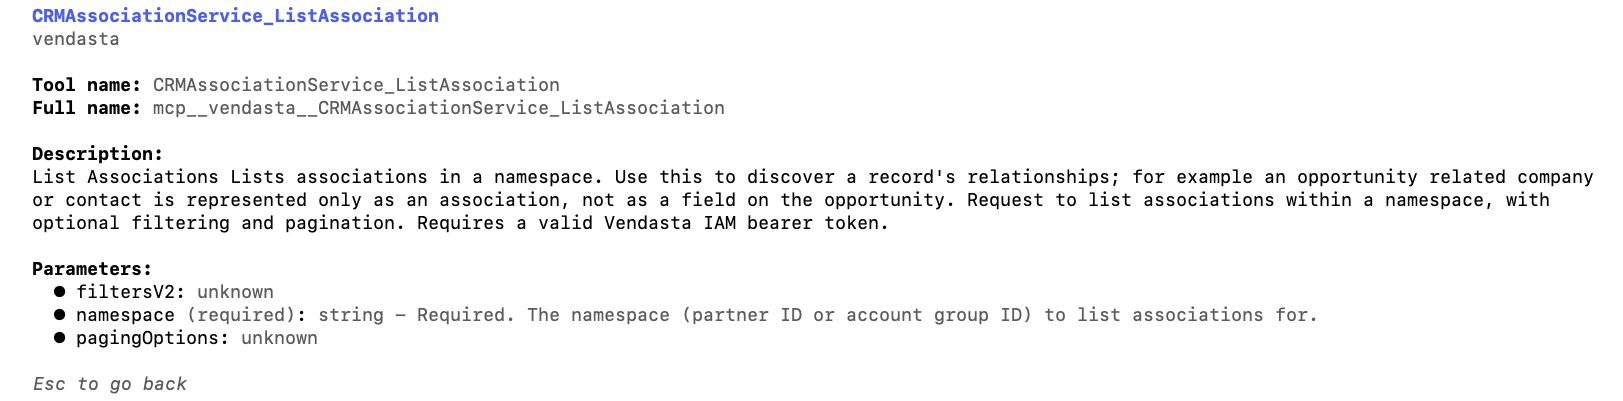
-
Or just ask your AI app:
What Vendasta tools do you have available?
It should reply with the same list — CRM actions, documentation search, and more. The exact list grows over time as more of the platform is connected.
Google's AI coding tools use Antigravity — the successor to Gemini CLI. Install it from antigravity.google and sign in with your Google account first.
The old gemini command no longer accepts individual sign-ins ("this client
is no longer supported") — that message means switch to Antigravity.
Installation and configuration
-
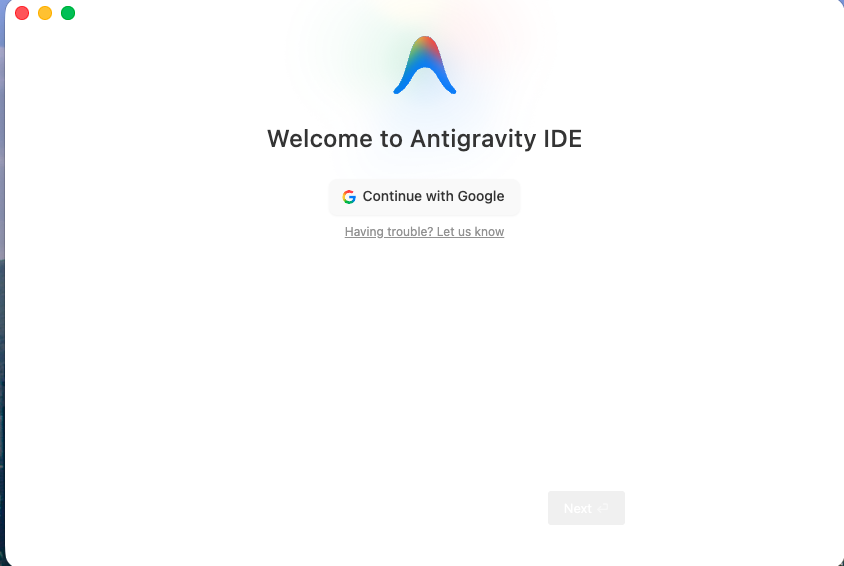
Install and sign in — download Antigravity from antigravity.google, open it, and continue with your Google account:
-
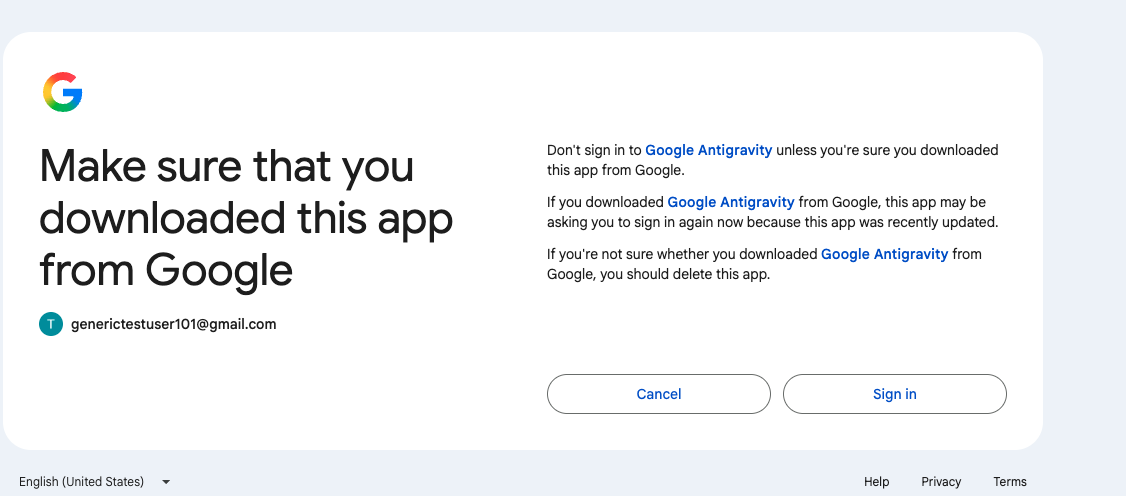
Approve the sign-in — Google asks you to confirm the app before signing in. Click Sign in:
-
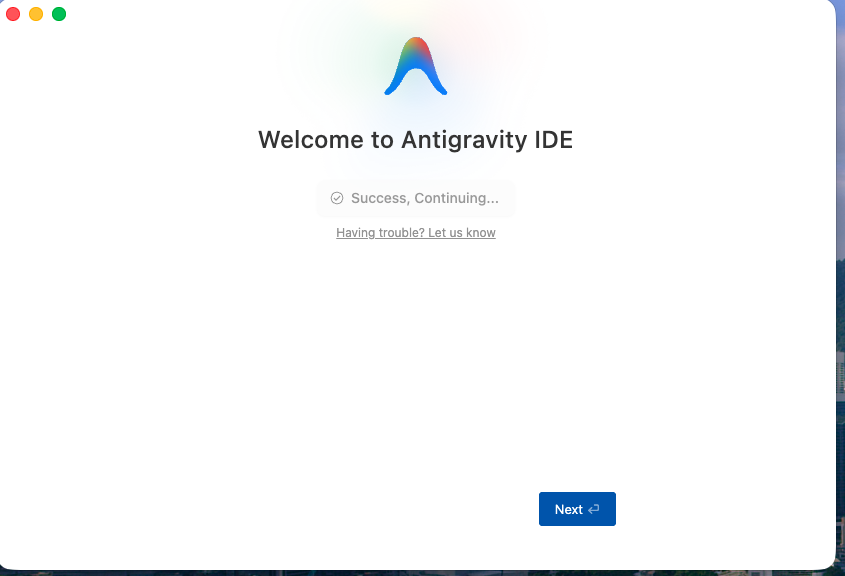
Sign-in confirmed — back in Antigravity, the welcome screen confirms it:
-
Create the configuration file — paste this whole block into a terminal (it writes the file in one go; nothing in it needs to be changed):
mkdir -p ~/.gemini/configcat > ~/.gemini/config/mcp_config.json <<'EOF'{"mcpServers": {"vendasta": {"serverUrl": "https://mcp.vendasta.com/mcp","oauth": {"clientId": "fffcd8a2-99d0-498e-82e6-b1cea4f049b1"}}}}EOF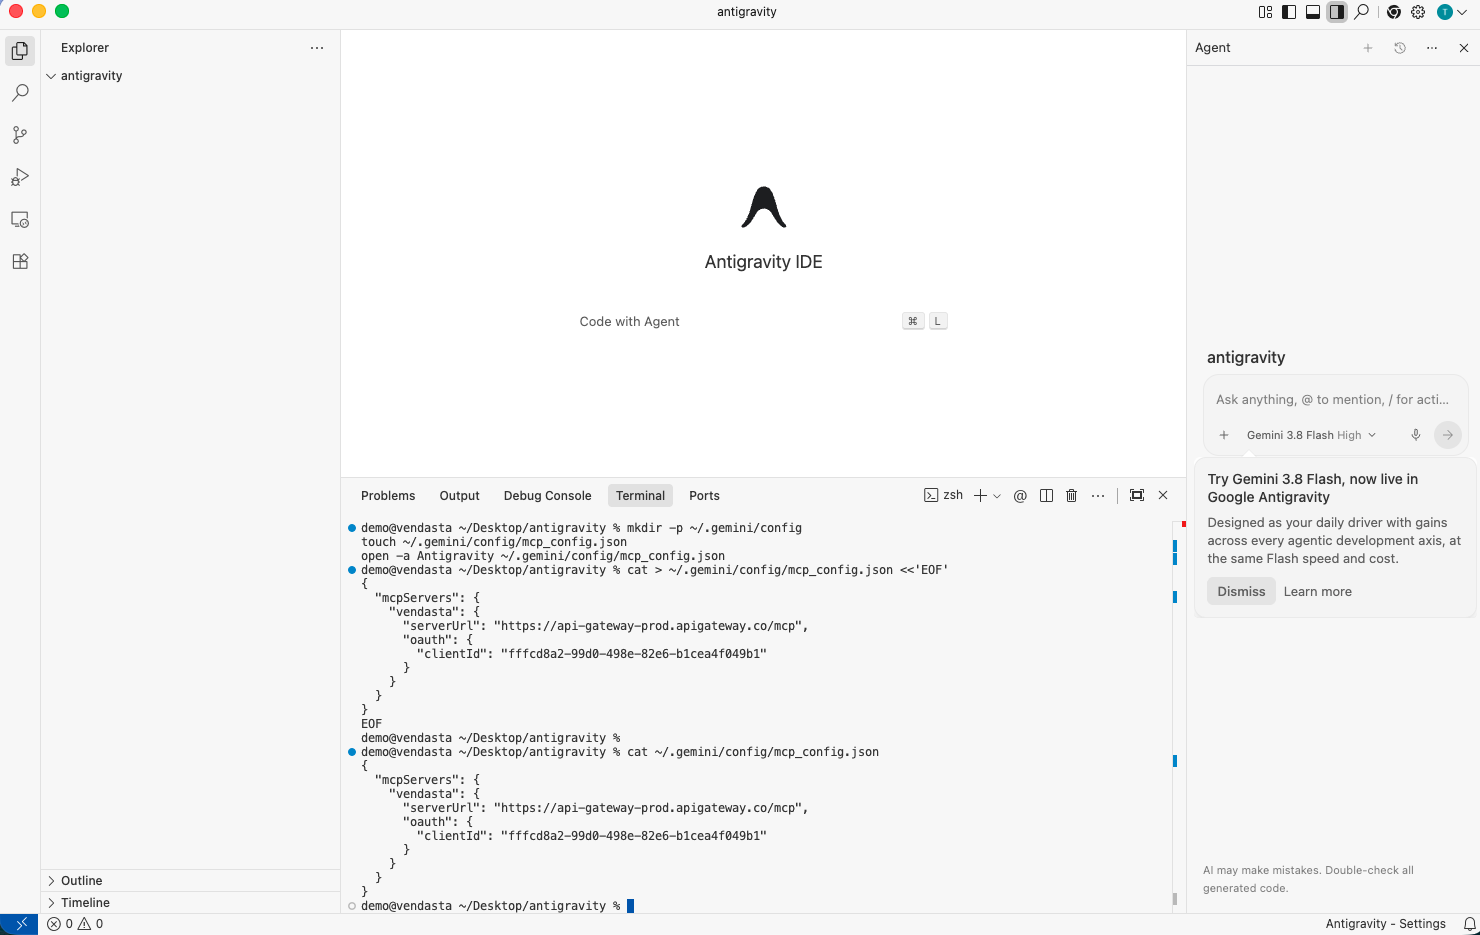
-
Open the MCP server list — in Antigravity's Agent panel (right side), click the … menu at the top and choose MCP Servers, then Manage MCP Servers:
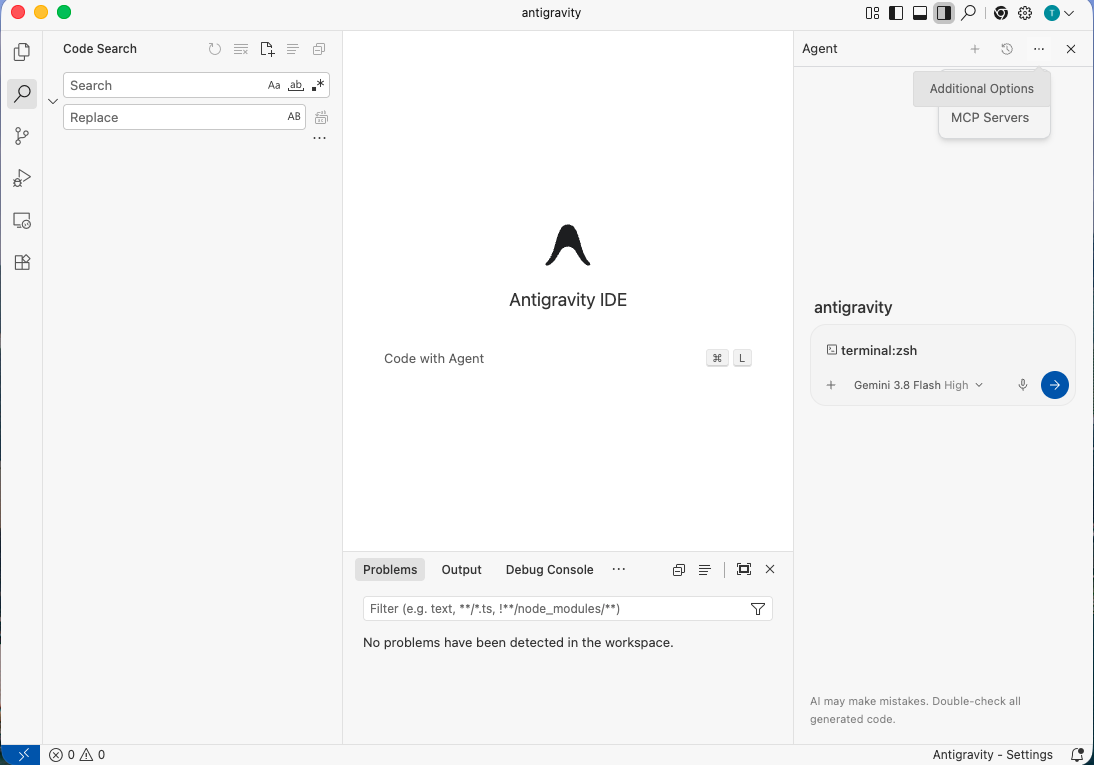 tip
tipIf the list says "No MCP servers installed", click Refresh — or reload the window (⌘⇧P → Reload Window) if Antigravity was open before you created the file.
Check it worked
-
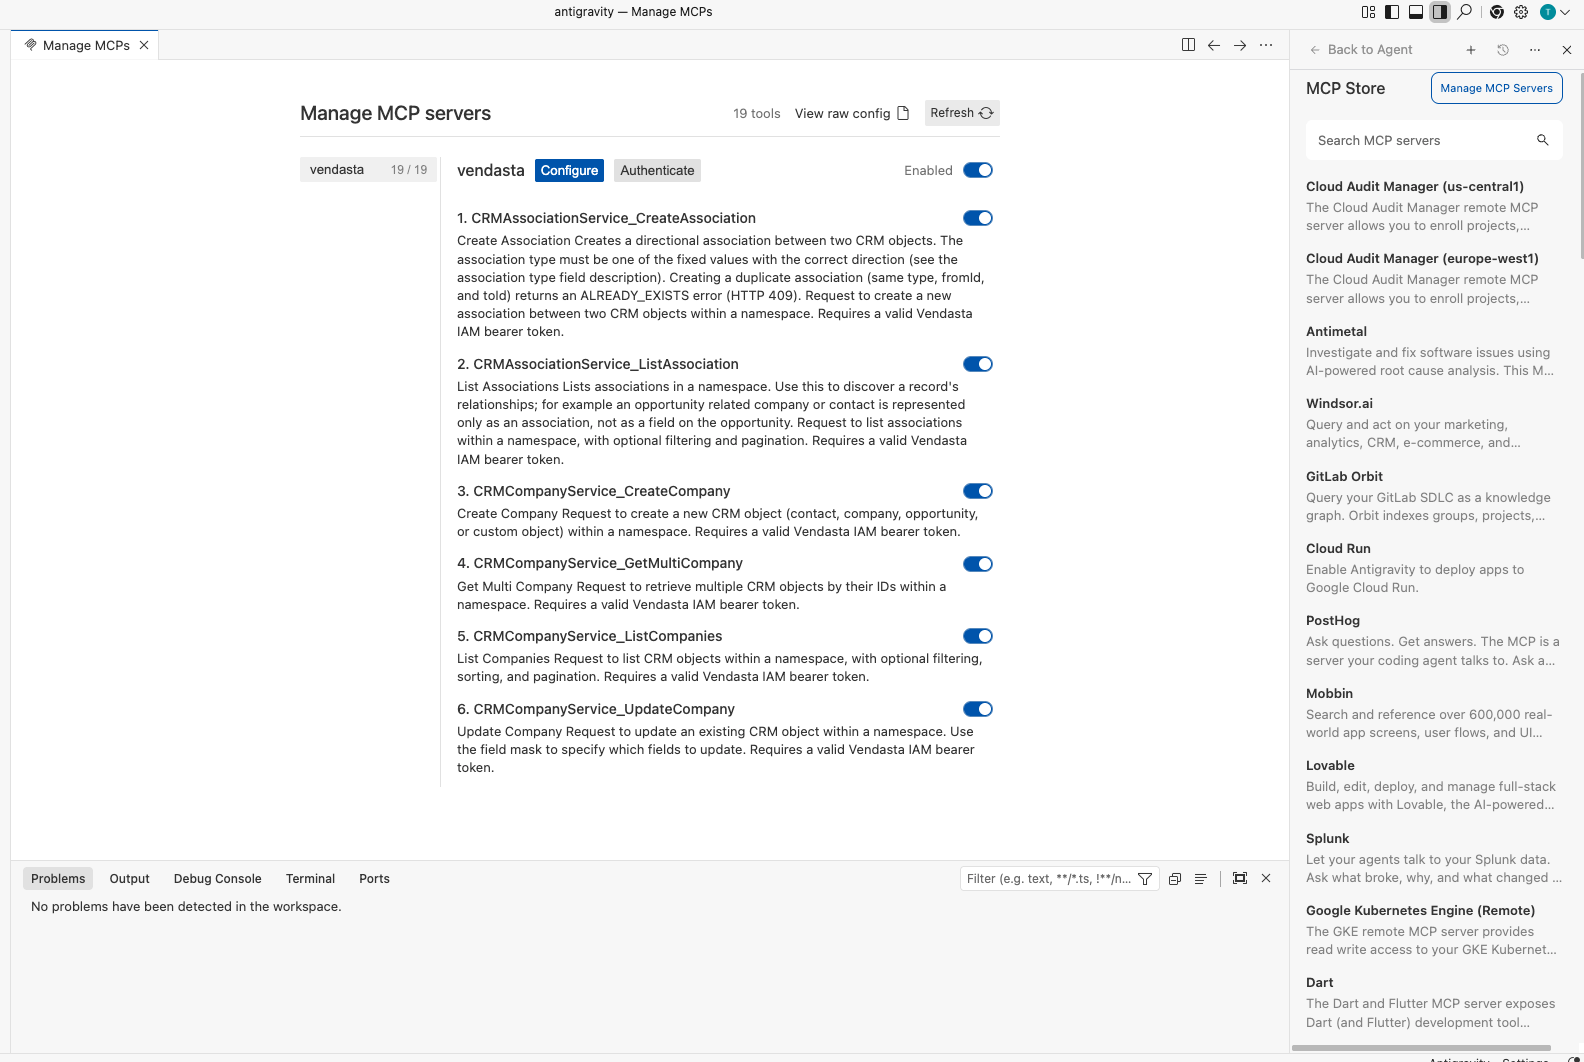
Check the server list — vendasta shows with all its tools, each with its own description and toggle:
-
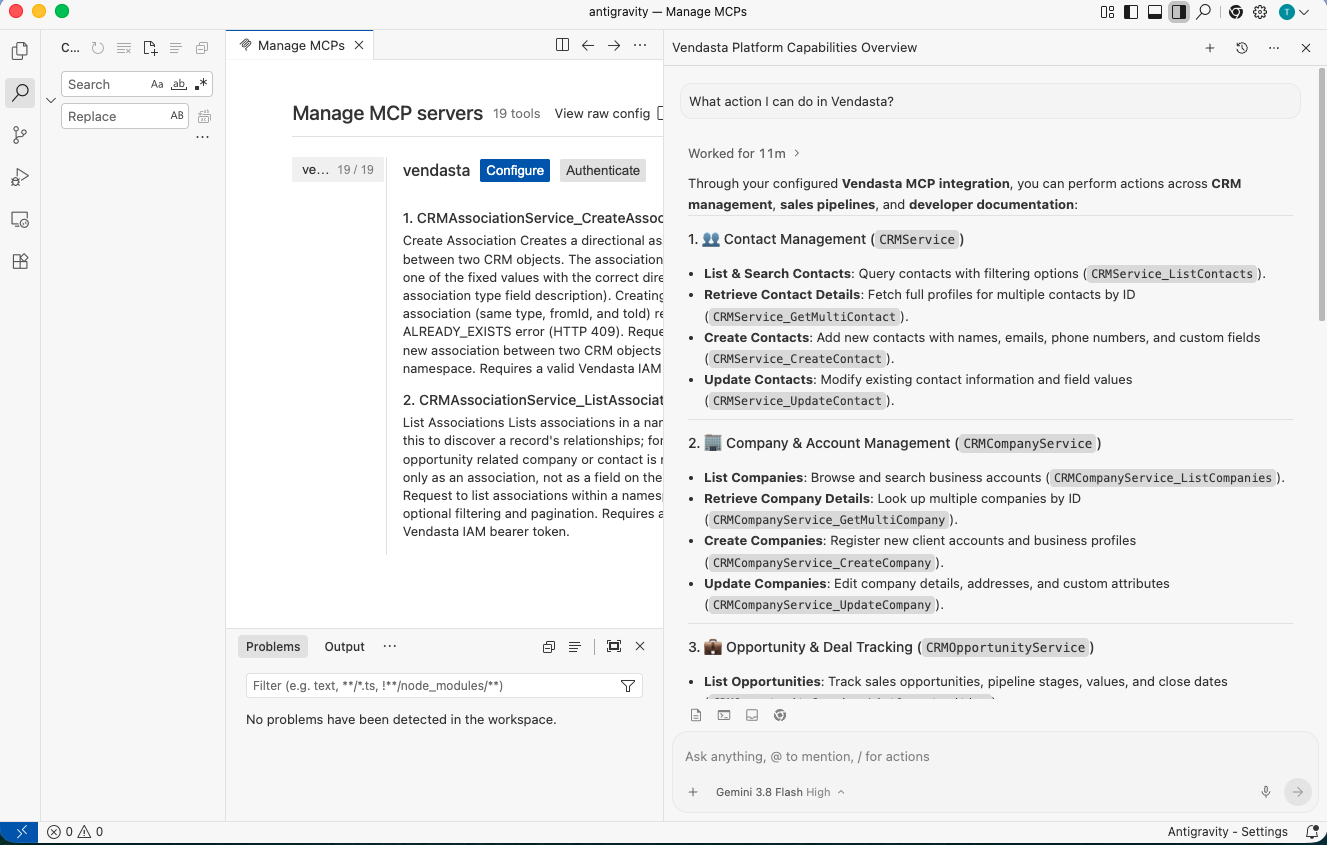
Ask in the Agent panel:
What action can I do in Vendasta?
The agent replies with everything the connection makes possible — contact management, companies, opportunities, and more:
Cursor doesn't support the Vendasta sign-in flow yet, so it connects with an access token instead.
Installation and configuration
-
Get an access token — two options:
- Easiest: generate one with the Access Token Generator right here in the portal — pick your environment, partner ID, and the scopes you need.
- Or follow the Authorization guide to create a service account and generate tokens yourself.
-
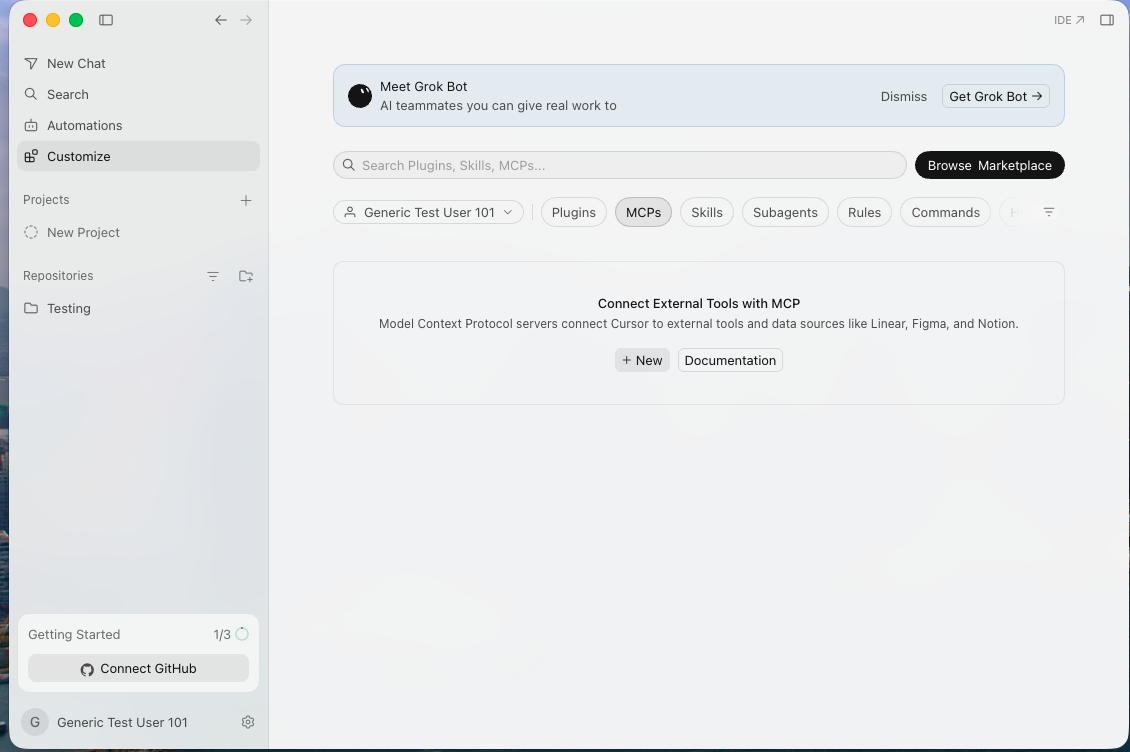
Add a new MCP server — in Cursor's sidebar, open Customize, select the MCPs filter, and click + New:
-
Paste the configuration — Cursor opens
~/.cursor/mcp.jsonfor you. Paste the block below, replace<your-access-token>(the only thing to change), and save with ⌘S:{"mcpServers": {"vendasta": {"url": "https://mcp.vendasta.com/mcp","headers": {"Authorization": "Bearer <your-access-token>"}}}}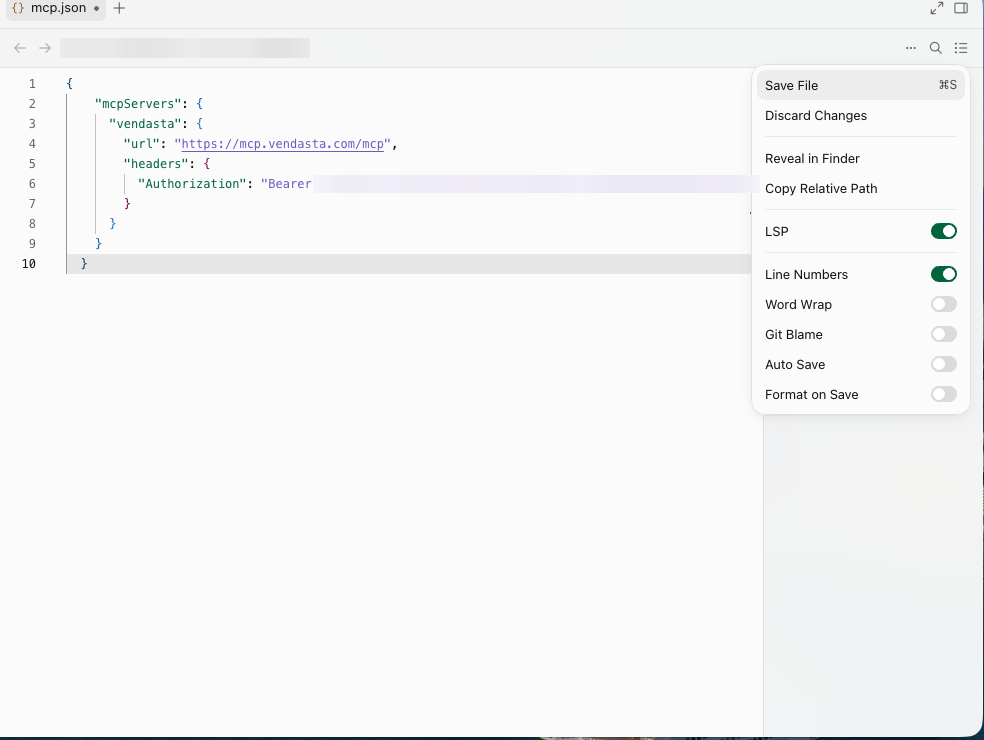
-
You're connected — back in the MCPs view, vendasta shows as connected with its tools enabled (click it to see or toggle individual tools):
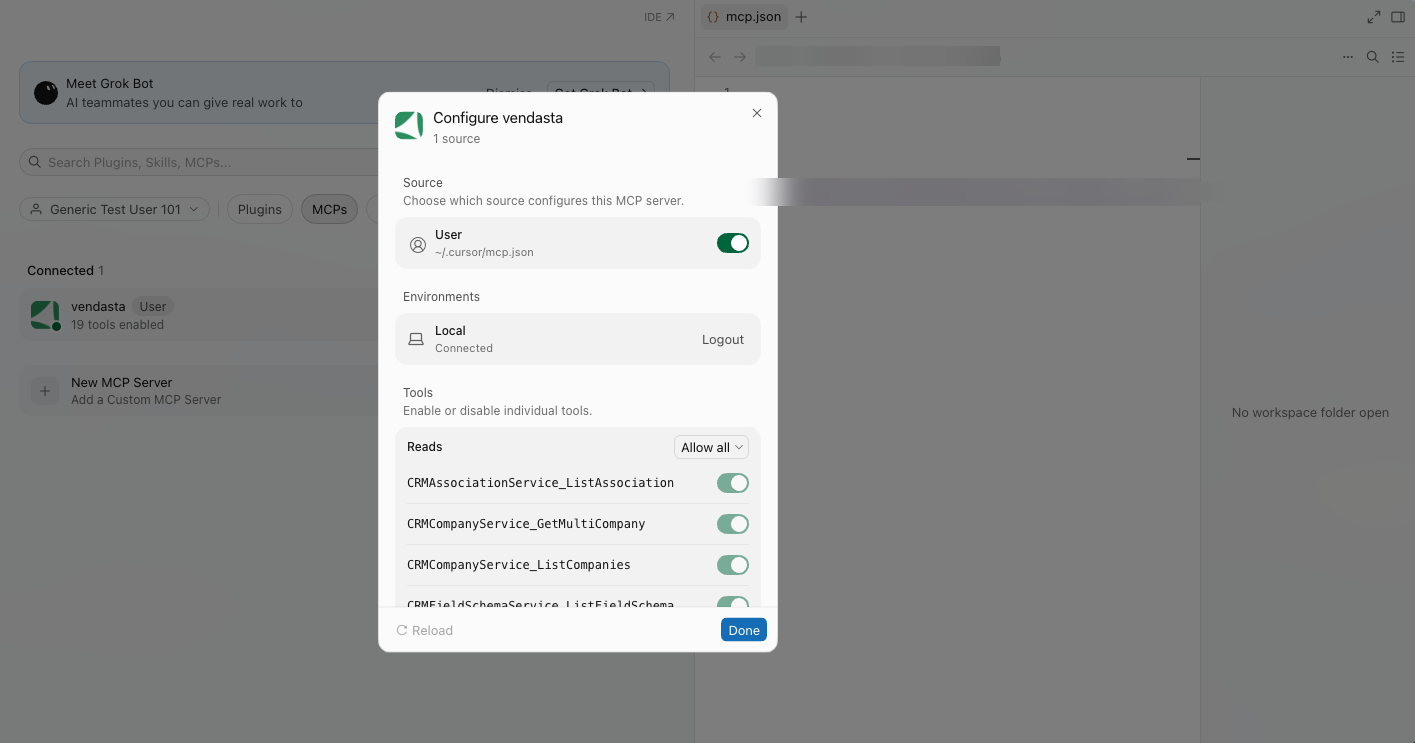
Access tokens expire. If Vendasta calls start failing with "Unauthorized", generate a fresh token and update the file.
Check it worked
-
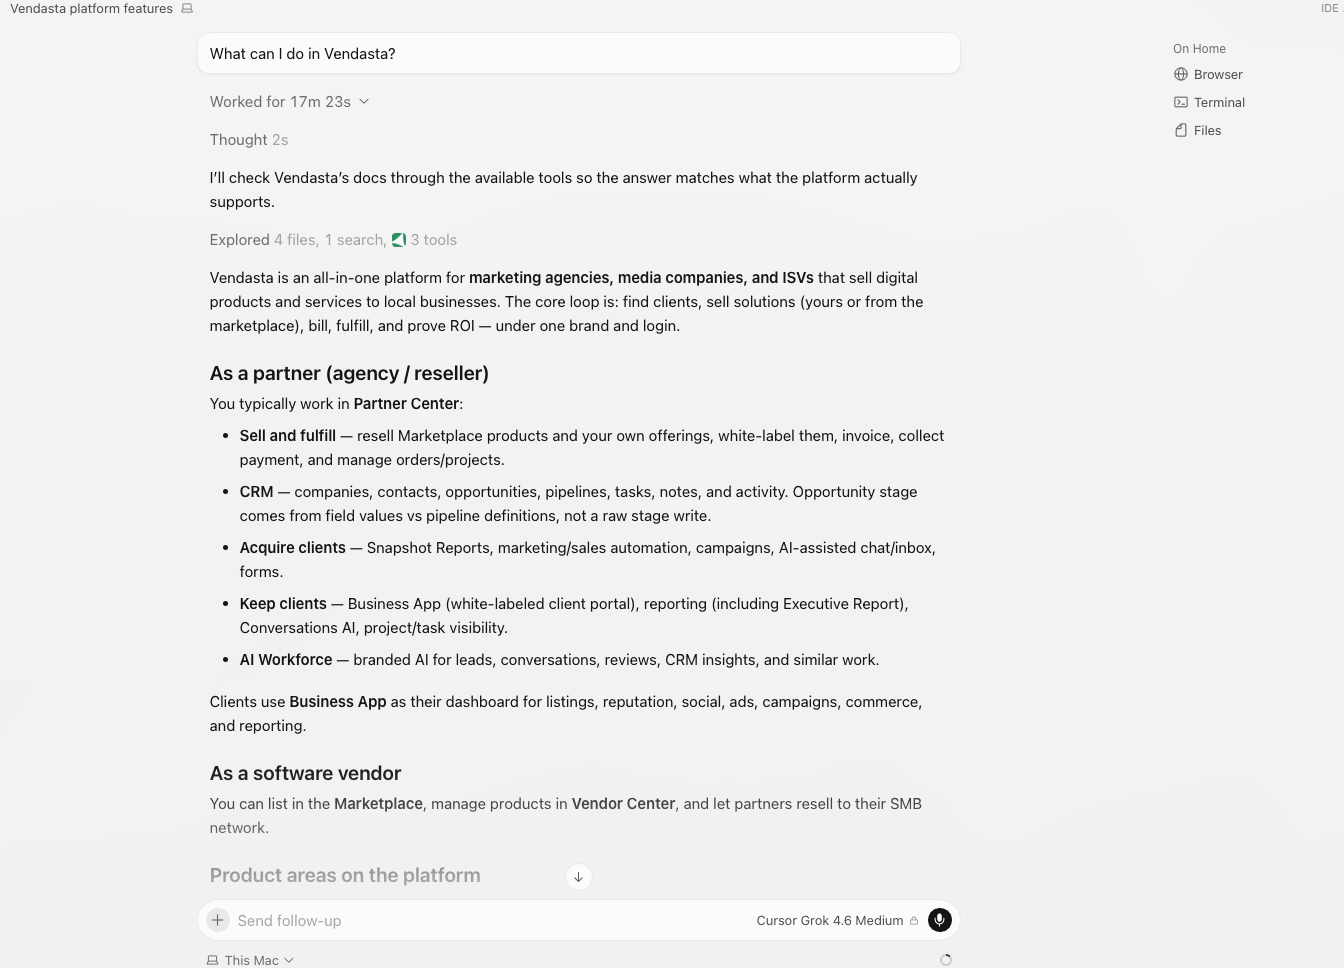
Ask Cursor's agent:
What can I do in Vendasta?
It should reply with everything the connection makes possible — CRM actions, documentation search, and more:
Good to know
What does signing in actually do?
Your AI app never sees your password. The browser sign-in hands it a scoped access credential for the Vendasta APIs — the same standard (OAuth) used when you connect an app to your Google account. Every action your AI app takes runs as you, with your permissions, nothing more.
How did my AI app learn the tools?
When your AI app connects, it asks the MCP server for its list of tools. Each tool comes with a description, which is how the AI app knows — without any extra setup — what it can do and when to use it.
Do something real
A five-minute walkthrough: create a contact, then see it in your CRM.
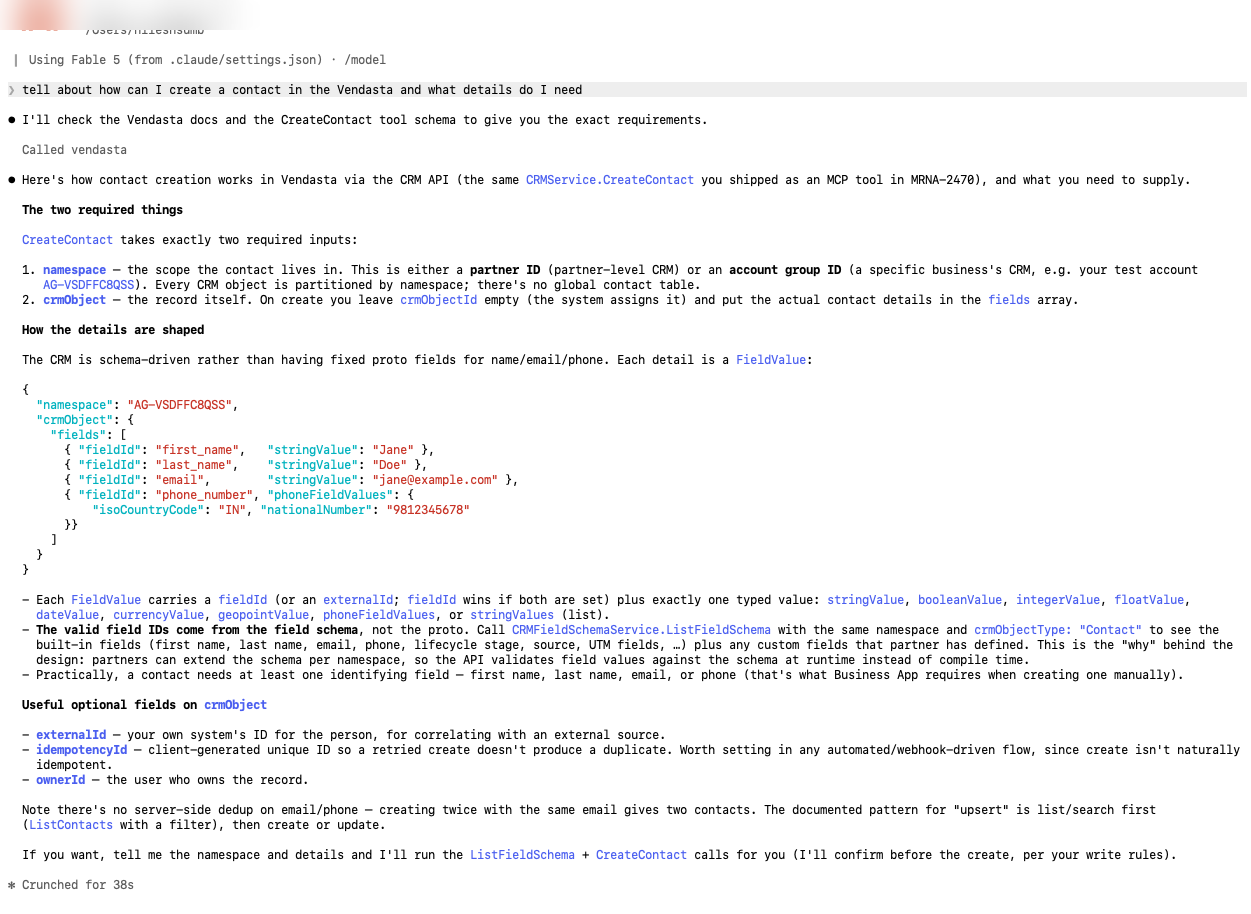
- Ask how — "How do I create a contact in Vendasta?" Your AI app searches the Vendasta documentation and explains the steps.
- Do it — "Create a contact named Jane Doe with email jane@example.com." The AI app asks you to confirm, then creates the contact.
- See it for real — open your CRM in the platform. Jane Doe is there.
Here's what that looks like in practice — the AI app finds the right tools, asks before writing, and reports back:
Anything in the tool list works the same way — just ask your AI app what it can do.
If something goes wrong
| You see | Why | Fix |
|---|---|---|
| Browser never opens for sign-in | The tool couldn't start the login flow | In Claude Code, type /mcp, select vendasta, choose Authenticate |
| Sign-in succeeds but tools fail with "Unauthorized" | Your session expired | Re-authenticate the same way — /mcp → vendasta → Authenticate |
| Server not in the list | Config not saved, or the app was not restarted | Re-paste the config and restart your AI app |
| Your AI app says it has no Vendasta tools | Connected but not enabled | Check the server is toggled on in your app's settings |